HTTP File Source
This guide walks you through connecting any existing HTTP-based file server to PixelFiddler as a media source. Use this when your images are already publicly or privately served over HTTP/HTTPS.
Prerequisites
Section titled “Prerequisites”Before you begin, ensure you have:
- A publicly reachable HTTP/HTTPS server that serves your media files
- A directory-style URL where your files are located (not a single file)
- (Optional) List of headers your server requires (e.g., Authorization)
- (Optional) Information on which client request headers you want forwarded
Step 1: Prepare Your HTTP Server
Section titled “Step 1: Prepare Your HTTP Server”PixelFiddler can work with any HTTP server that makes assets accessible via predictable URLs.
Typical setups include:
- Static hosting (e.g., Nginx, Apache, Caddy)
- CDN endpoints (Cloudflare, Fastly, Akamai, etc.)
- Object storage with HTTP access (MinIO, NetApp, internal services)
- Custom application servers serving public images
Step 2: Gather Required Information
Section titled “Step 2: Gather Required Information”Collect the following details before creating the media source:
| Field | Description | Example | Required |
|---|---|---|---|
| Base URL | Root URL where your files are located | https://cdn.example.com/images/ | Yes |
| Predefined Headers | Headers always included in outgoing requests | X-API-Key: secret123 | No |
| Proxy Headers | Headers forwarded from client requests | Authorization | No |
| Follow Redirects | Whether PixelFiddler should follow 3xx responses | true | No |
Important Notes About Base URL
Section titled “Important Notes About Base URL”- This must point to a directory, not a specific file. Good: https://example.com/assets/ Bad: https://example.com/assets/logo.png
- PixelFiddler will append filenames to this base path dynamically.
- The base URL must be reachable from PixelFiddler’s servers.
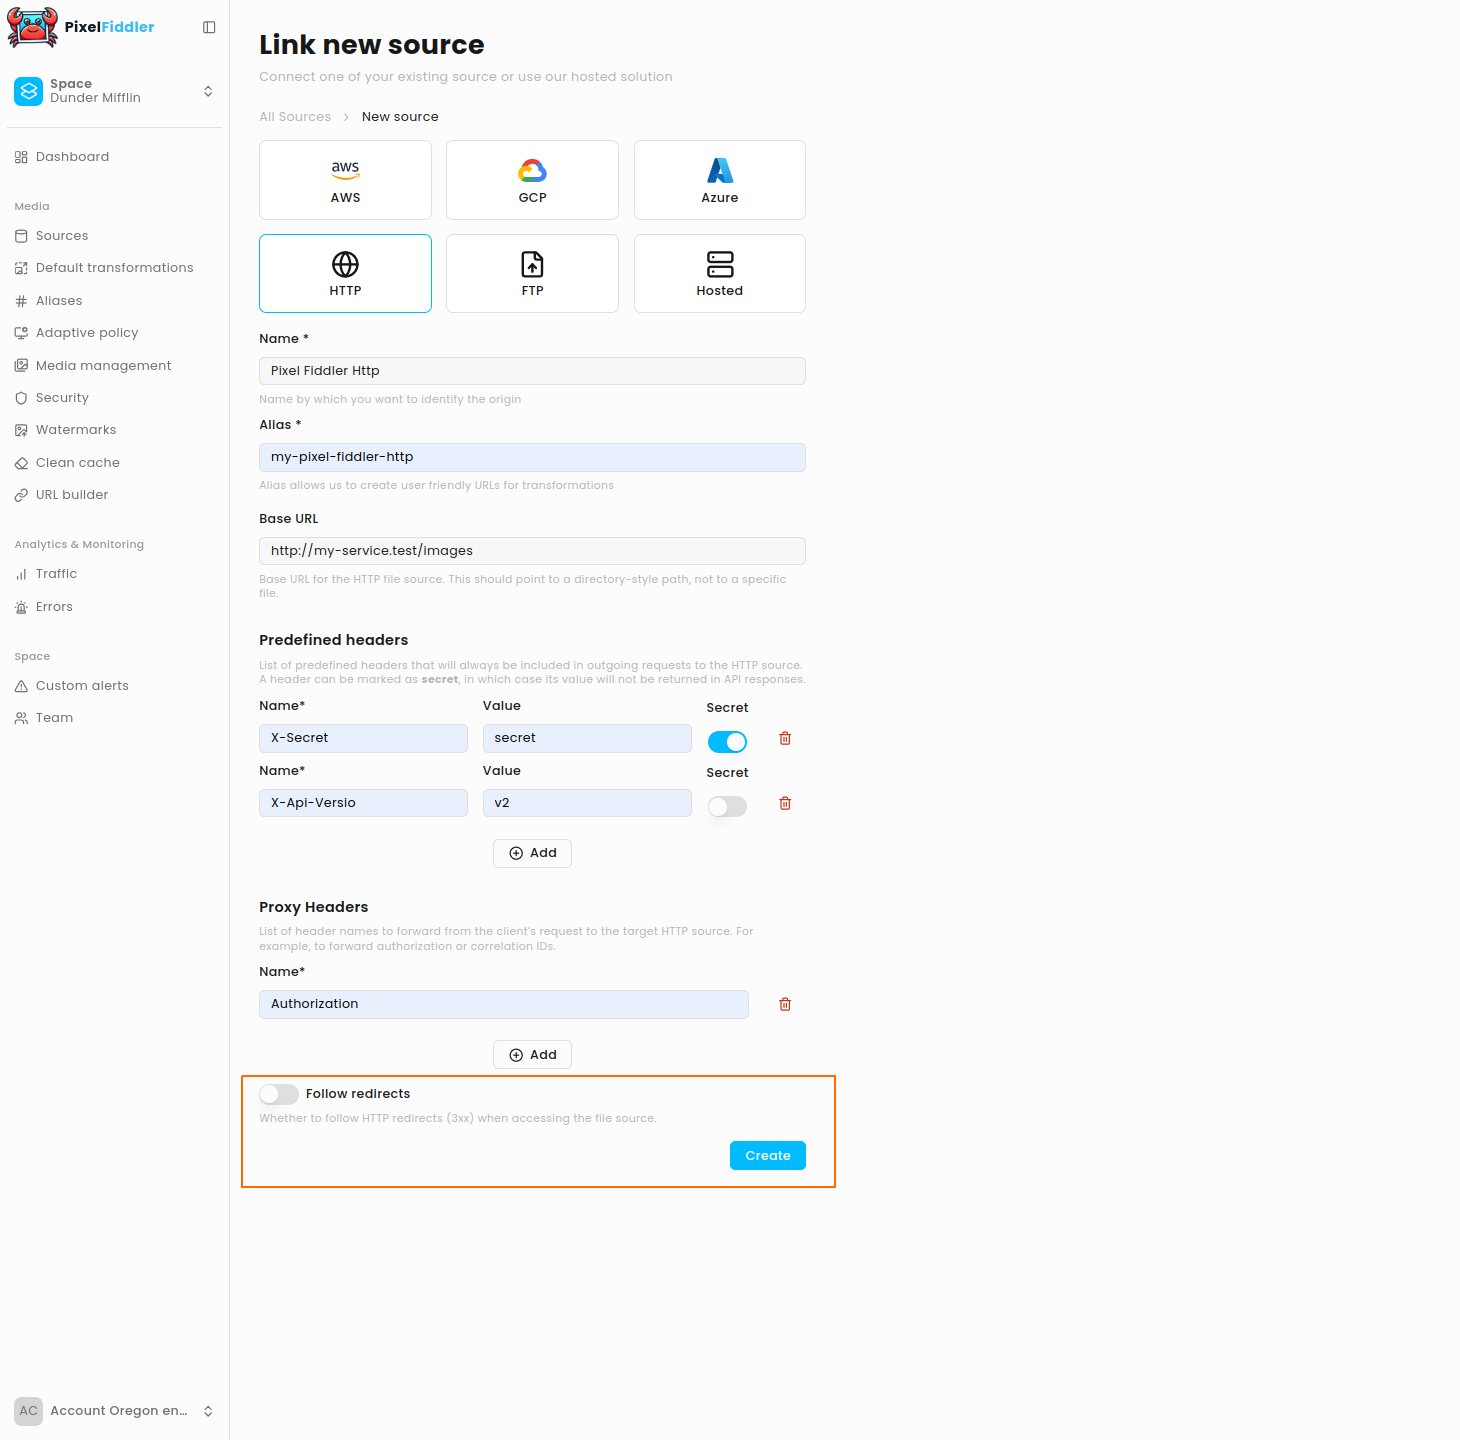
Step 3: Create a New HTTP Media Source in PixelFiddler
Section titled “Step 3: Create a New HTTP Media Source in PixelFiddler”- Navigate to your Sources page in the PixelFiddler dashboard
- Click “Link new source”
- Select Http as your source type
- Fill in the connection details using the information from your Google Cloud setup
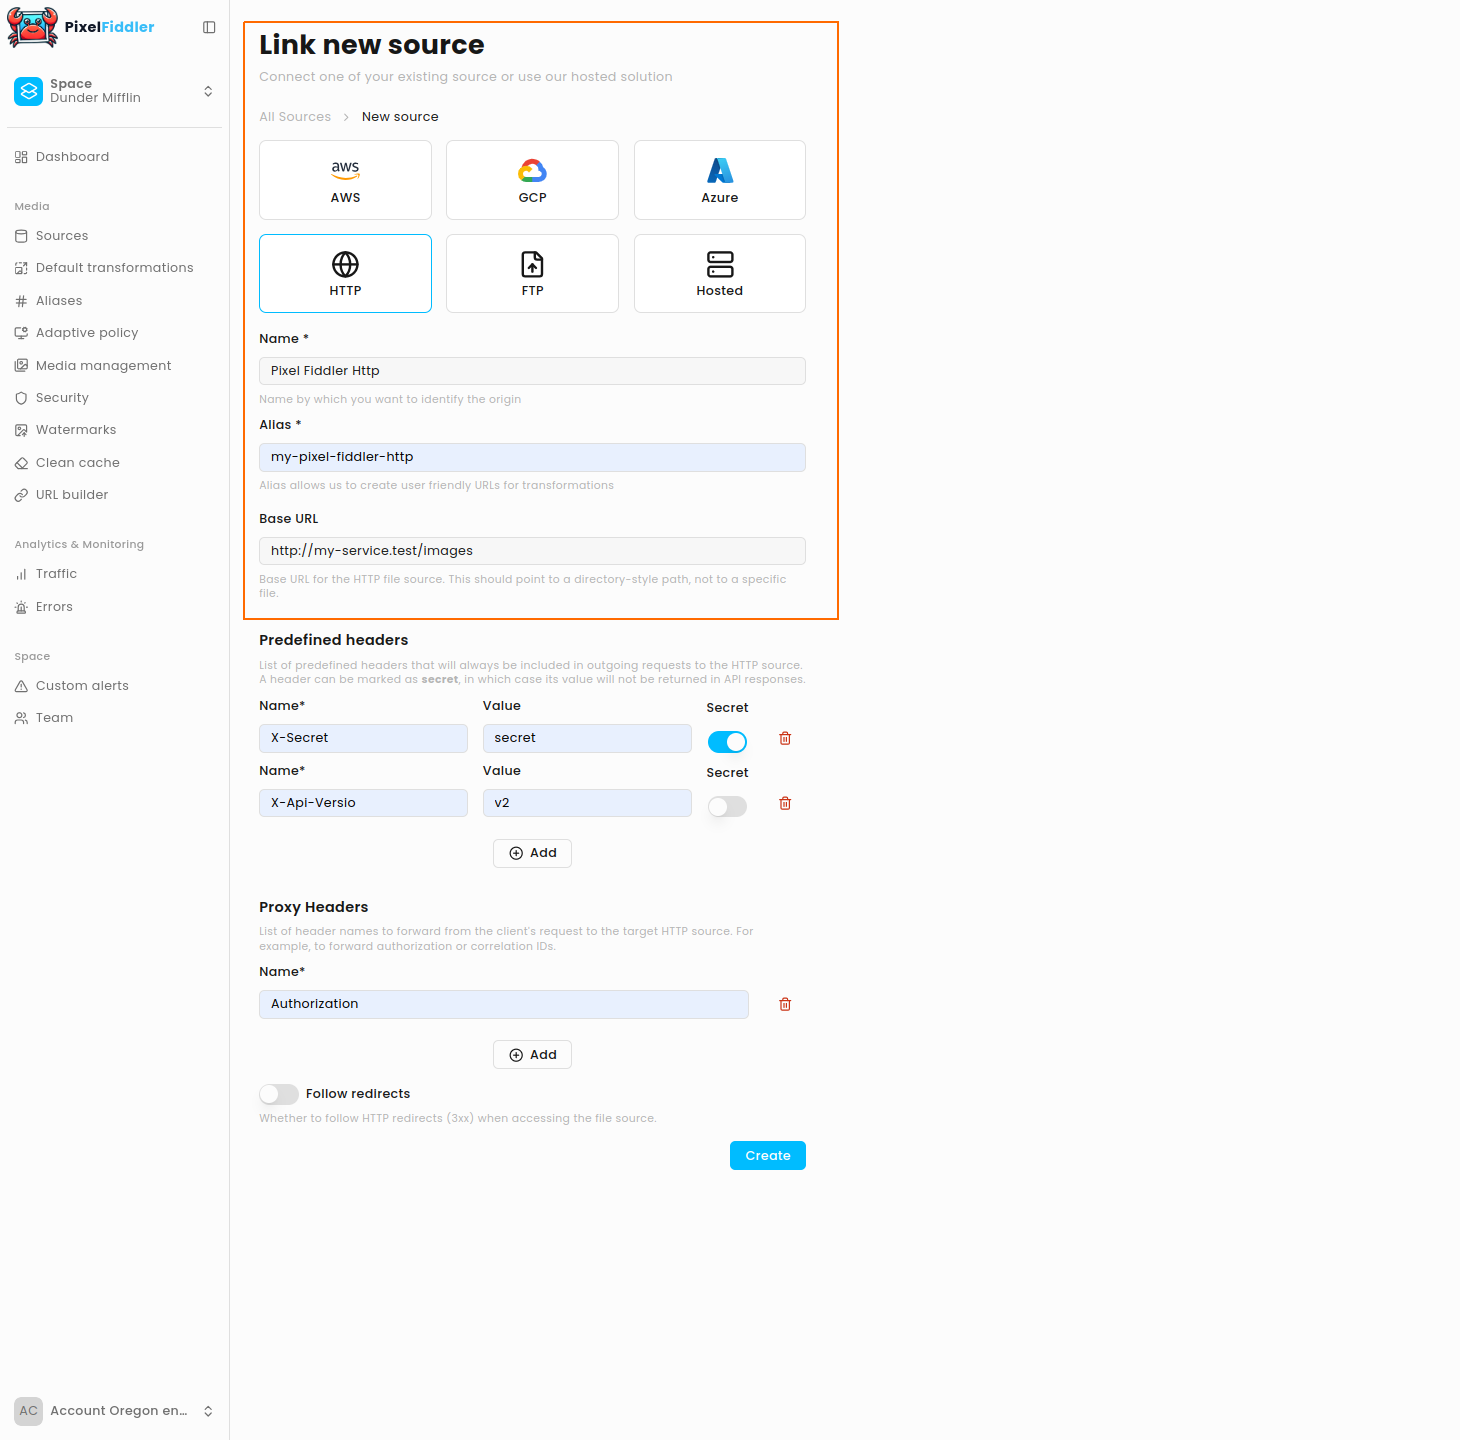
Required Configuration
Section titled “Required Configuration”| Field | Description | Example |
|---|---|---|
| Name | Display name for your source | Product CDN |
| Alias | Unique identifier (kebab-case) | product-cdn |
| Base URL | Root location of your files | https://cdn.example.com/images/ |
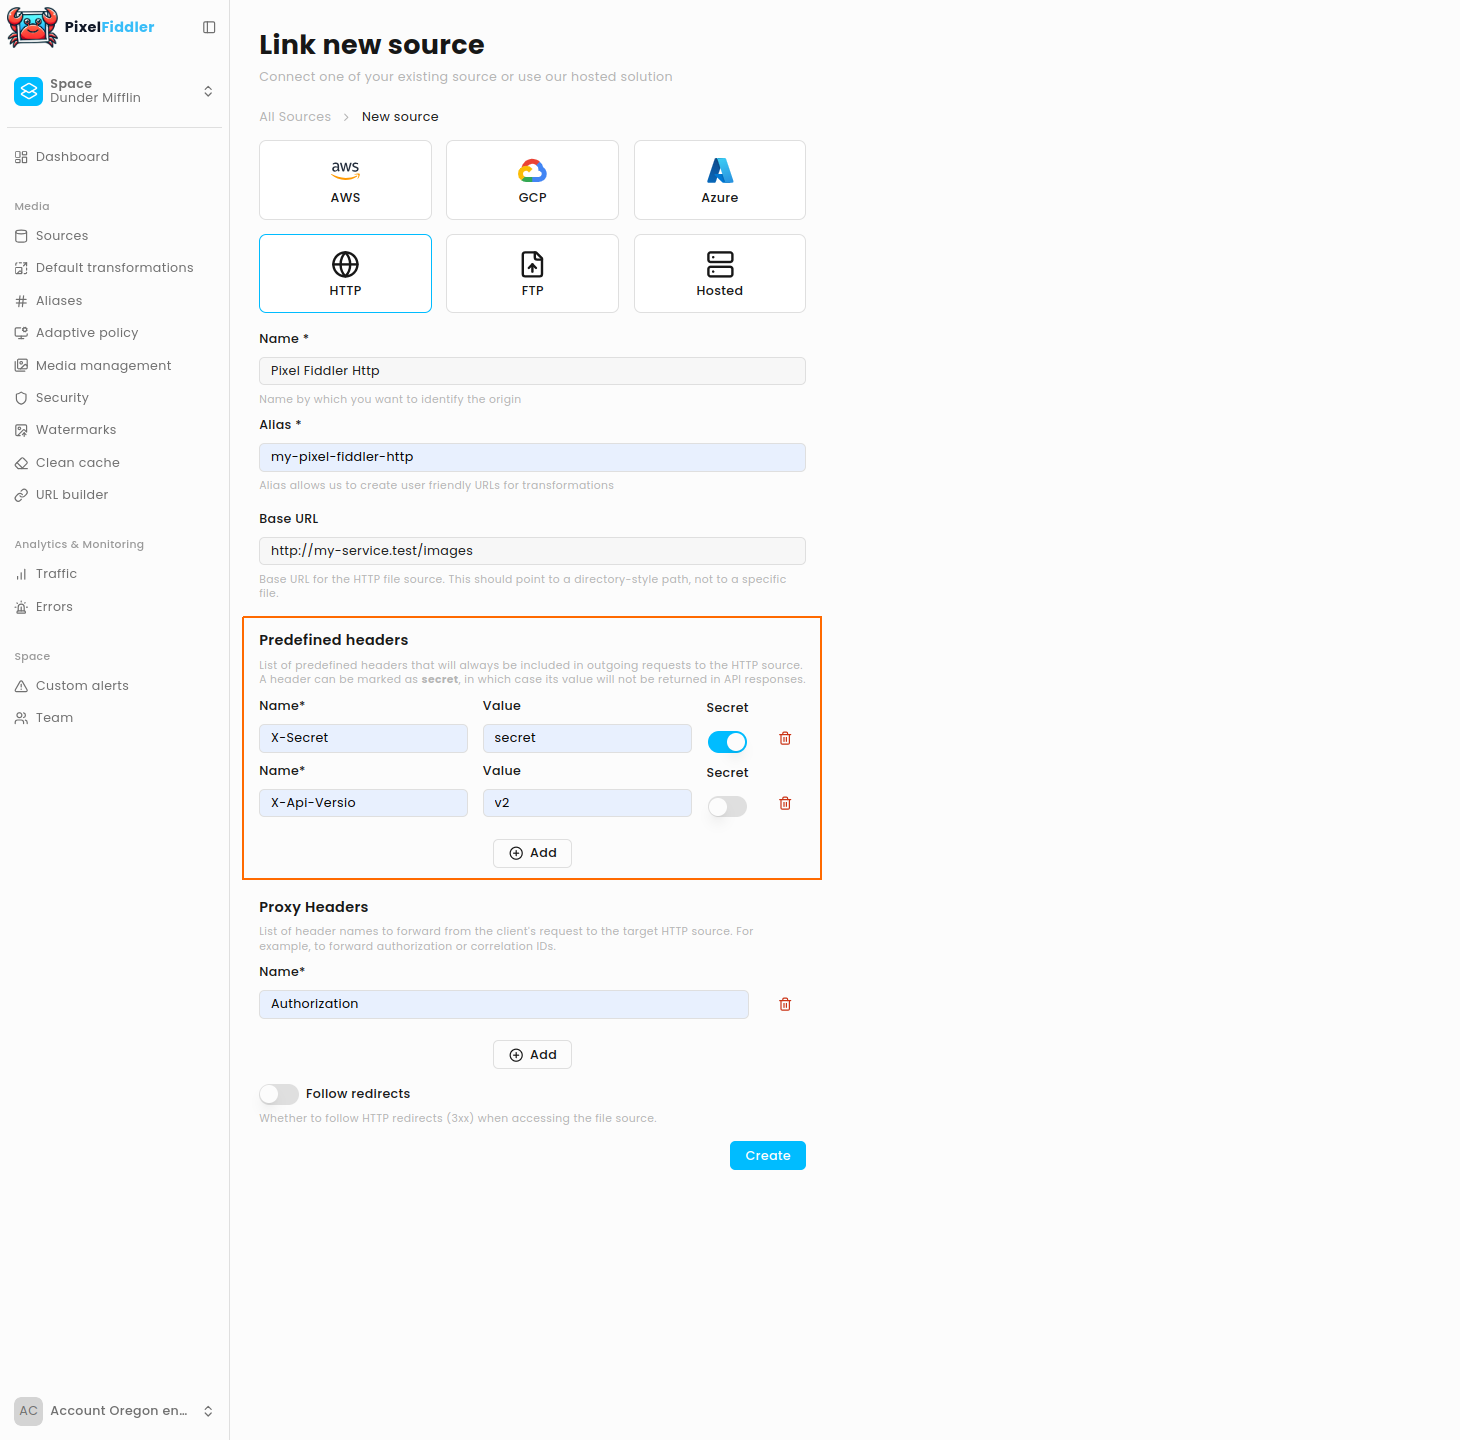
Optional Configuration
Section titled “Optional Configuration”Predefined Headers
Section titled “Predefined Headers”Headers that PixelFiddler will always send with each request. Useful for authentication with static secrets or when you want to specify any other header that should be included in every request.
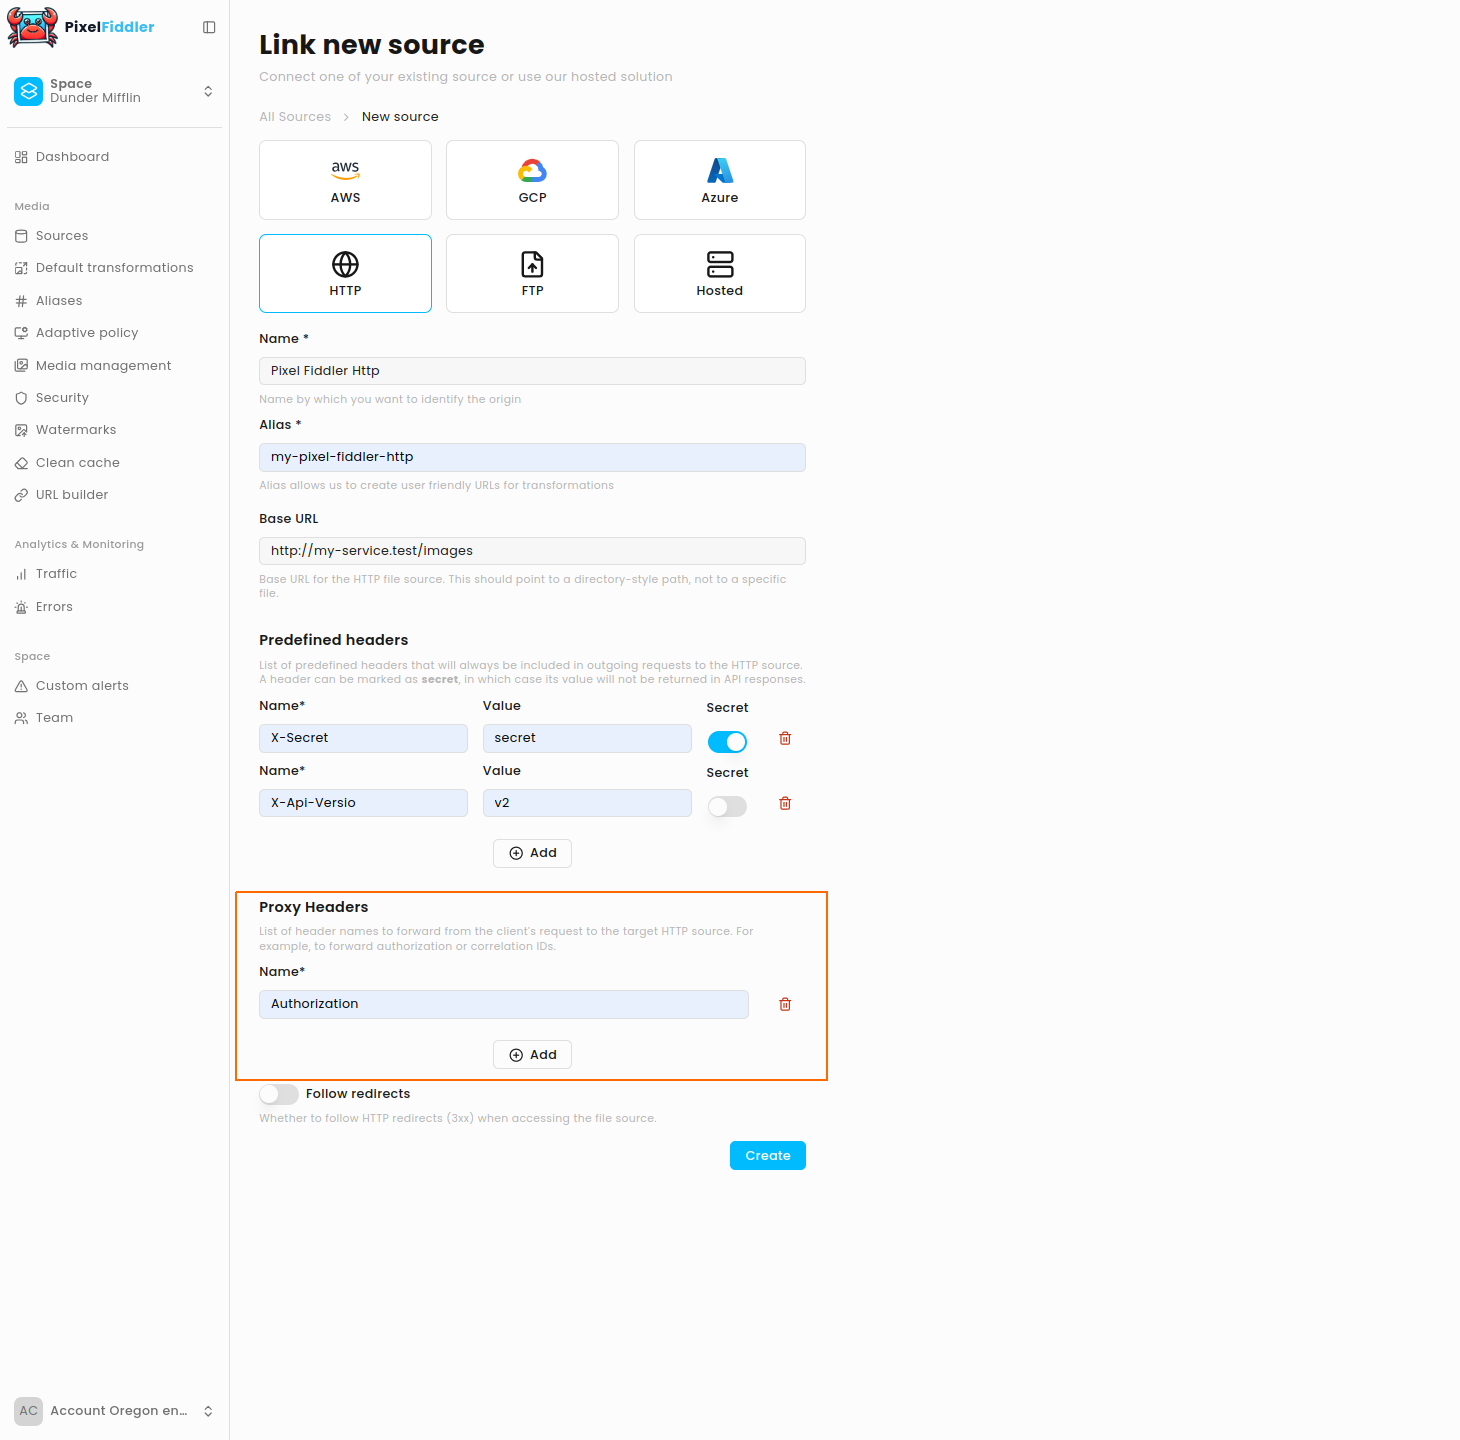
Proxy Headers
Section titled “Proxy Headers”Headers automatically forwarded from the client request to the HTTP source. Most probably you want to use it to forward all kinds of auth headers.
Follow Redirects
Section titled “Follow Redirects”If your server responds with 3xx:
- Enabled (default) --- PixelFiddler automatically follows the redirect
- Disabled --- redirect responses are returned as-is